Introduction
The Composer is an application for use in OpenSim. If makes building scenes full of objects quick and easy.
You don’t need to be an expert to use it, as everything is clearly laid out, and objects can be created, placed and modified just by clicking.

The Composer uses “modules”, which are separate objects that contain a large range of different items that you can include in your builds, such as buildings, plants, interactive signs, furniture, etc. These can be purchased separately, although to get you started the Composer comes supplied with a couple of basic modules.
NOTE: Due to restrictions in OpenSim software, your Composer can only work on Worlds that either (1) you own or (2) for which you are the Estate Manager. Attempting to use it in a World in which neither of these is the case will result in error messages. There is currently no way round this. However, any visitor will be able to use a Composer that satisfies those requirements.
The true power of the Composer is in the additional modules. To purchase modules, search “RezMela Composer module” in the Market.

Getting started
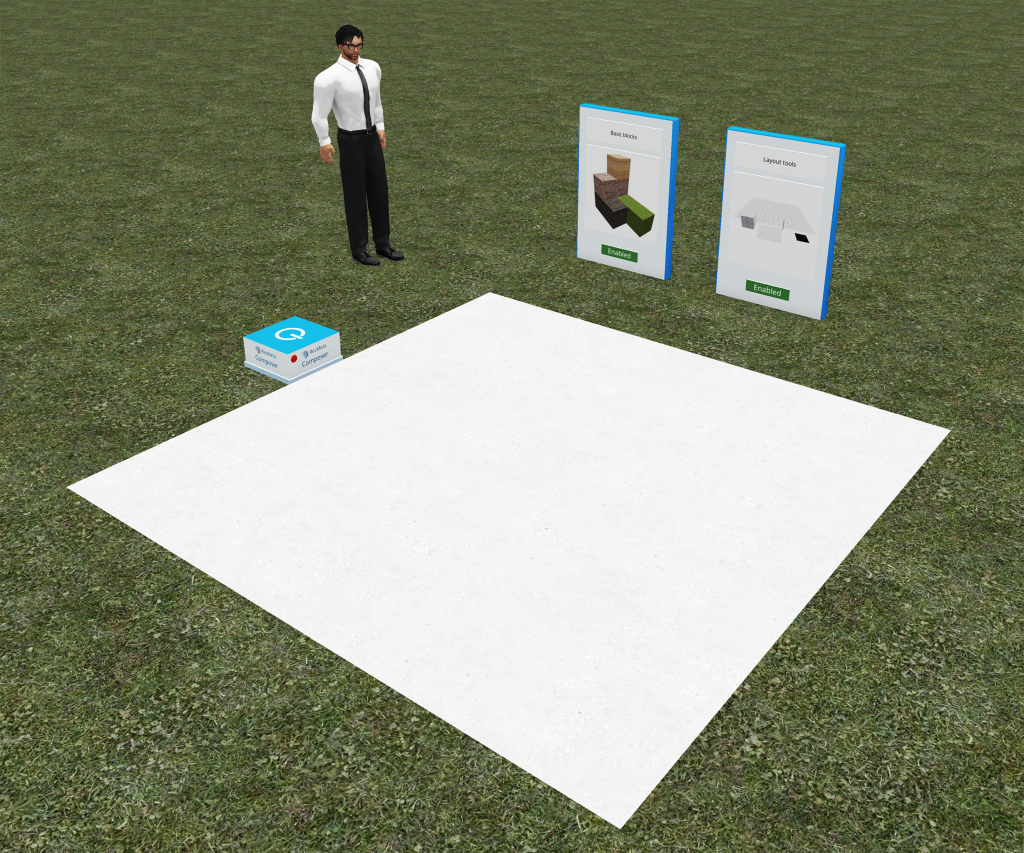
First, place your Composer and any modules you wish to use. In this guide we’ll focus on the two supplied modules, but the same basic methods apply to all Composer modules.
TIP: You may want to put your modules out of the way somewhere so they don’t get in the way of your scene – as long as your modules are somewhere in the same World as the Composer they will work.
You can enable and disable modules by clicking the red or green button on the front. You might want to disable modules you’re not using if you have a lot of them. By default, they’re enabled and ready to use.

When you have the Composer and your modules placed, click the blue square on top of the Composer to sign in.

The first time you do this, the Composer will give you a HUD object and automatically attach it to your screen. Once this has loaded, you will see the Home menu:

This HUD will be the main way you control the Composer. When not in use, it shrinks down to a couple of small icons (which we’ll look at later), and when you sign in again it changes back to full size. If you ever detach the HUD, the Composer will detect this the next time you sign in and give you a new one automatically.
If you click the Finish button the Home menu, you will be signed out of the Composer; click the blue square to sign in again.
Now let’s look at adding some objects.
The Create menu
To create objects in your scene, click the Create button on the HUD. After a short delay while it loads the menus, you’ll see a list of categories:

Objects in the Create menu are organised into categories and sub-categories to help you find what you need. The more modules you have, the more categories of objects.
In our example, the two categories we have are:
- Basic blocks – cubes that fit together to make structures
- Layout tools – objects that allow you to place other objects precisely
Let’s look at the first category. Click Basic blocks and you’ll see the following:

We now have six types of block to choose from. You can click on any one of these to choose it for your scene – here’s the first type:

Here we see a preview image showing a brick wall cube. Having selected this, we just need to click on the base of the Composer to place a brick cube:

Now you’ve placed your first block, you can either place more objects on the base, or you can place them on the block you’ve created. If you place one block on another, it will be automatically lined up perfectly.
For example, if we click the back button (<) to go back to the list of blocks, and then select one with a different texture, such as Wood:

Now if we click on top of the brick block, a wood block appears, precisely aligned:

Note that this kind of automatic alignment only applies to objects that are designed that way, such as these blocks. Other types of object allow free placement anywhere on their surface.
Also remember that you can only place Composer objects on the Composer base or on other Composer objects. If, for example, you click on normal ground or on an unrelated object you’ve rezzed from your inventory, the Composer will ignore the click.
Now you can add more blocks, building up any shape you like.

If you want to move a block, you can do this by first selecting the block.
Left-click the block and hold the mouse button down for a second or so (this is called a “long click”). The block will glow, and a stream of particles will come from the selected block towards your avatar:

You can now click anywhere else in your scene to move the block to that place. Here, for example, the block has been moved up:

When you’ve got the block where you want it, you can click it again (just a normal short click) to deselect it and carry on.
Saving your scenes
Once you have created a scene, you can save it and recall it at any time.
On the HUD, use the back arrow < to get back to the Home menu, and select the File option.
You’ll see this menu:

This menu controls your saved scenes.
If you click the Save button, the HUD changes and a new input box appears on the top right of the screen:

You can type a name for your scene into the input box and click Submit to save the scene with that name.
You will now see the Home menu again. This time, you can click Clear to clear the current scene, and all your scene objects will disappear.
If you go back into the File menu and select Load, you can pick your previously saved scene from the list and the scene will be restored to how it was at the time you saved it.

It is always a good idea to save your work regularly in any application, and this applies equally to the Composer!
The other options the File menu are:
- Rearrange (advanced use, covered elsewhere)
- Delete – delete any saved scene
- Import – drop an exported scene into your Composer
- Export – copy your scene’s save file to your inventory
Using the Import and Export functions, it’s easy to share your saved scenes with anyone – just export your scene, give them a copy of the saved scene notecard and they can import that notecard into their Composer.
Modifying objects
There are various ways you can manipulate objects by selecting them and using the HUD.
Let’s look at the other objects in the Create menu, in the Layout tools category:

Objects in that category are divided into three sub-categories: Grids, Vertical and Cubes. All these objects have a common purpose: to let you position other objects precisely. And when you sign out of the Composer, these Layout Tools become invisible, reappearing when you sign in again.
For now, we’ll just use one of these objects to demonstrate the ways you can manipulate objects. From the Layout Tools category, select the Cubes sub-category:

This contains two very similar objects – pick either one and place it in your scene:

Don’t worry about how to use the Layout Cube. For now, we’re just using it as an example object. If you’d like more information about Layout tools, there is a separate guide here.
Select the cube by long-clicking it, and look at the HUD menu:

This is the Selected object menu, and gives you several ways in which you can act on the selected object:
- Remove – remove the object from the scene
- Resize – change the size of the object
- Rotate – turn the object around
- Nudge – move the object by increments
- Clone – make a copy of the object
And, of course, you can move the selected object by clicking anywhere in your scene, as we saw earlier.
Let’s look at each of these options in a little more detail.
Remove
If you click this option, the object you have selected will be deleted.
Resize
This option gives you a further menu with various size changes:

The + percentages on the left make the object that much larger, and the – percentages on the right make it smaller.
The Random option resizes the object by a random amount, useful for giving a natural appearance to some types of object.
Rotate
The Rotate option gives you more choices:

All of these are rotations around the centre of the object, usually in the vertical axis (unless the object was placed on a non-horizontal surface).
Nudge
The Nudge option also gives you a further menu of options:

The Forward, Back, Left and Right options move the object in that direction relative to the camera (that is, the view you’re seeing).
The North, South, West and East options move the object in those directions (use the viewer’s mini-map to orient yourself if necessary), useful for precise positioning in the World.
The Up and Down options, unsurprisingly, move the object up and down.
The Amount + and Amount – options let you change the scale of the above operations. Initially, all movements are in increments of 1m. You can see the current Amount on the bottom line of the HUD, together with the current camera angle (again, for precise positioning).
Clone
This option doesn’t have a following menu. Instead, the currently selected object is duplicated and the new object, positioned slighly above the original, is now selected automatically so you can place it where you like.
This is useful as a shortcut when you don’t want to backtrack through the categories to find a previously-created object.
Also, objects with properties (such as text and image objects, available in other modules) will have those properties copied. For example, if you create a text sign with a certain text in a particular color, the clone will inherit those and be identical in every way to the object you cloned.
Settings
In this section, we’ll look at the Settings menu of the Composer HUD.
Some of these settings are “toggles” – that is, you click them to turn a feature on, and then click again to turn them off. These have the character “!” to show they are turned on, or “?” to show they are turned off.
Settings like this revert to their default state when you sign out of the Composer.
Random
This enables or disables the Random feature. When enabled, some objects will be resized and rotated at random to give a more natural appearance to things like trees, rocks, etc.
By default the feature is disabled.
See this document for a more detailed explanation of this feature.
Grid snap
This option is a toggle that changes the behaviour of objects such as Layout Tools, where objects placed are automatically positioned (snapped) in a grid pattern for ease of alignment.
Sometimes you might want to place objects freely, in which case you can disable snapping here.
Reset
This option resets the Composer. Only do this if you are experiencing major problems.
Resetting the Composer will lose your current scene. Any objects in the scene will still be there, and using the Clear function will remove them. However, they cannot be interacted with, and will not be included if you save the scene.
It is always a good idea to save your work periodically!
You can also reset the Composer using the small red button on the sign-in box:

HUD features
This section looks at some more features of the Composer HUD.
Beacons
Sometimes you might find that you have difficulty signing in to the Composer because objects in your scene are hiding the sign-in button. Or maybe you’ve just forgotten exactly where the Composer is!
Fortunately, there’s an easy way to sign into your Composer without clicking the blue button.
Consider this example, where a brick wall obscures the button:
If you look to the top left of your screen, you’ll see two buttons that the HUD displays while you’re signed out:
We’re interested here in the button on the left, with the RezMela logo (we’ll discuss the other button in the next section).
If you click the left-hand button, this will cause any nearby Composers that you own to show a long vertical beacon with a random color:
Clicking this beacon will have the same effect as clicking the normal sign-in button, and you will see your HUD display the main menu.
The beacon extends for 128m above and below the Composer, plenty of length for it to be visible outside of your scene.
If you don’t click the beacon within 30 seconds, it will automatically vanish. Click the HUD button again if you wish to bring it back.
A random, bright color is used for the beacon, but it will always be the same color for each copy of the Composer in your region. The reason for this is that clicking the HUD button will cause all your Composer copies to show beacons:
Knowing the color of the beacon that a particular Composer copy shows will make it easier to find that copy in a crowded region.
NOTE: The HUD is only able to activate the beacons of the nearest 16. Also, other nearby scripted objects (including Composer modules) count towards this limit. In addition, only objects within 96m of your avatar can be detected. These are OpenSim limitations.
Click to View and Click to Jump
This is a feature that lets you view an object close up with two clicks. It also allows your avatar to teleport to an object in a similar manner.
These features are explored in this document.
Minimize/Maximize
One small but useful feature is that you can shrink the HUD down to a single bar, in a similar way to standard desktop application windows.
To do this, simply click the title bar of the HUD. Click again to restore the HUD to its normal size.

This can be useful when you don’t want the HUD to obscure parts of your scene, but you don’t want to sign out.
Conclusion
This concludes the RezMela Composer user guide. If you notice any errors or omissions, or if you would like to see more content here, please get in touch and let us know.
You must be logged in to post a comment.