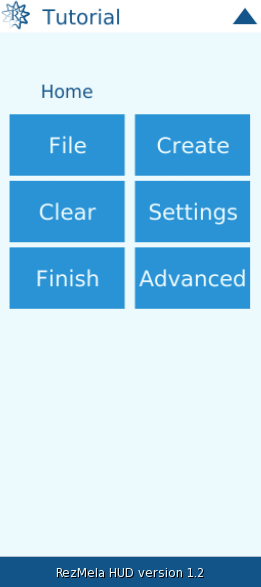
This guide covers the various options in the File menu. You get that menu by clicking the “File” option on the top left of the HUD:
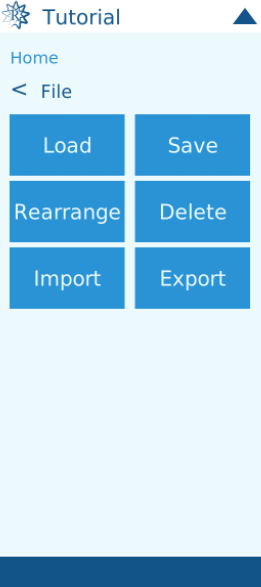
Here are the options in the File menu:
Let’s go through these one by one.
Load
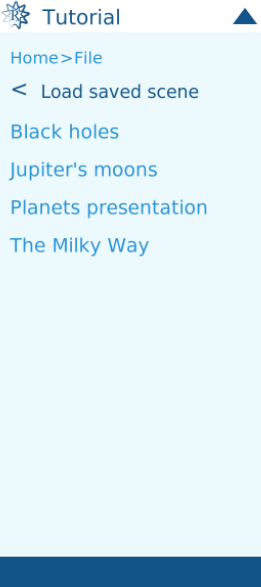
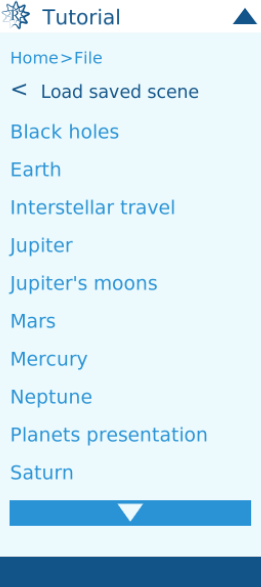
This option loads a saved scene. When you click “Load”, the names of any saved scenes you have are listed. For example:
If you haven’t saved any scenes, the list will be empty and you will only be able to go back to the main menu.
When you click one of the scene names, you will be asked if you’re sure you want to load it:
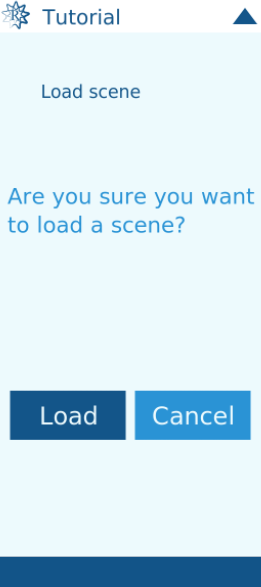
If you click “Cancel”, you’ll be taken back to the File menu. If you click “Load”, the App will load the scene.
While the scene is loading, you’ll see this on the HUD:

If the scene is small and loads very quickly, that message might be displayed too briefly to be visible.
When the scene is loaded, you are returned to the main menu.
Important notes about how loading scenes works
If you already have objects in your scene and you load another scene, this will not overwrite the original objects. Instead, the saved scene will be added to your current objects. This is so that you can merge different scenes together. However, it does mean that unless you want to merge scenes, you need to select “Clear” from the main menu before loading a new scene.
This means that if you load the same scene twice without clearing in-between, you will get each object in the scene twice. It might look normal, because both copies of each object are in exactly the same place, but you might experience glitches.
If you need to load scenes that contain similar objects – for example, different layouts of the same furniture in a room – then consider using the “Rearrange” option instead of “Load” (see below).
Multiple pages of scenes
When you click “Load” and see the list of available scenes, there is only enough space to show 10 scenes at a time. If you have more than 10 scenes, you will see the first 10 with an down-arrow bar at the bottom, like this:
Clicking that down-arrow bar will take you to the next page of scenes:
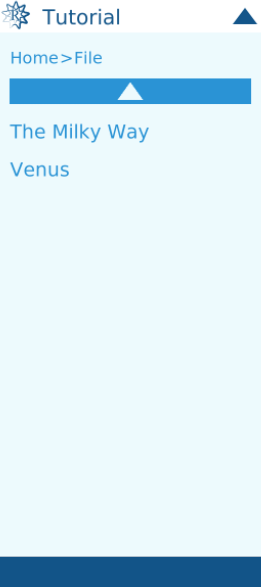
In this case, there are no more scenes to display, so there is no down-arrow bar. However, there is an up-arrow bar at the top to go back to the previous page.
There is no practical limit to how many scenes you can save.
Save
You can use this option to save your current scene.
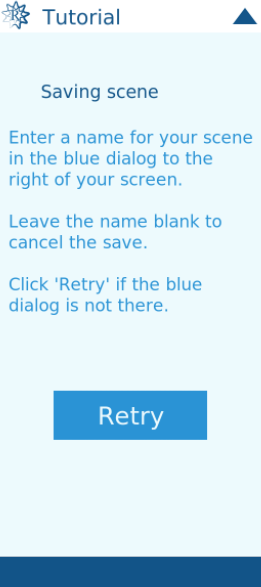
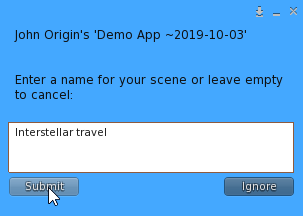
When you click “Save”, the HUD will change to display this:
And on the top right of the screen you will get this blue dialog:
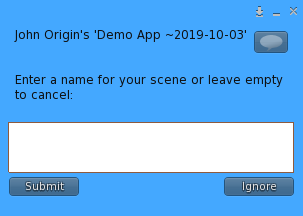
If you change your mind and don’t want to save, you can just click “Submit” and you’ll be returned to the main menu.
Otherwise, enter the name you want to give your scene in the blue dialog as follows, and click “Submit” to save your scene.
If for any reason the blue dialog goes away (for example, if you click “Ignore”), you can get it back by clicking “Retry” on the HUD.
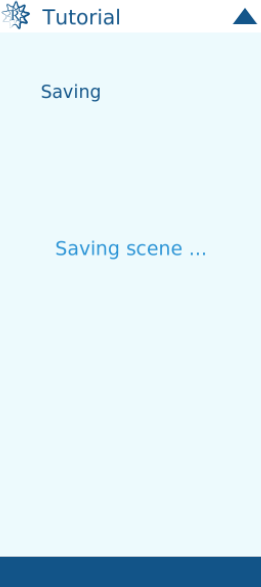
While the scene is saving, this is displayed on the HUD (although this might be too brief to be visible):
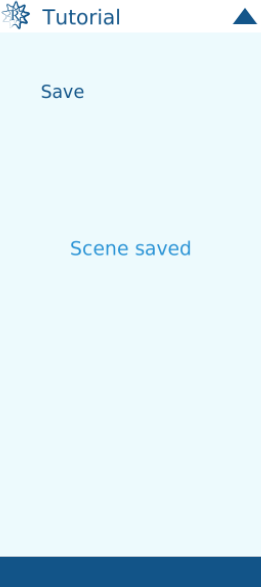
And finally you get a confirmation that the scene saved successfully, and you will be returned to the main menu.
Rearrange
This option is for more advanced users. Beginners can skip this section.
The “Rearrange” option is similar to the “Load” option, except that no new objects are created. Instead the objects currently in the scene are moved, rotated, resized, etc in order to make up the new scene.
It’s not common to use this option, but it’s there for certain situations. For example, if you wanted to demonstrate different layouts of furniture in a room without clearing the whole scene before loading the next.
For this to work, you need to save the scenes something like this (using the furniture example):
- Create the scene with the first arrangement
- Save that scene as (e.g.) “Layout 1”
- Edit the scene to move the furniture into their new positions
- Save that scene as (e.g.) “Layout 2”
- Continue for any other layouts
Then (assuming you have cleared the scene), you can use “Load” and select “Layout 1” to load the objects, then use “Rearrange” and select any other of these layout scenes to move those objects into their respective positions.
When you select “Rearrange” you will get a menu similar to the “Load” menu, listing all your saved scenes:

Delete
You can use the “Delete” option to remove any of your saved scenes. You’ll get a similar list of scenes to the “Load” option:
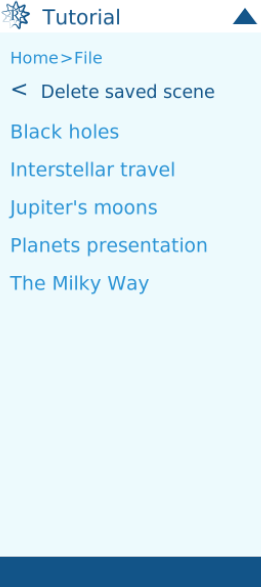
Now you can select which scene you want to delete (in this example, “Interstellar travel”) by clicking it. You’ll then be warned that you’re about to delete the scene:
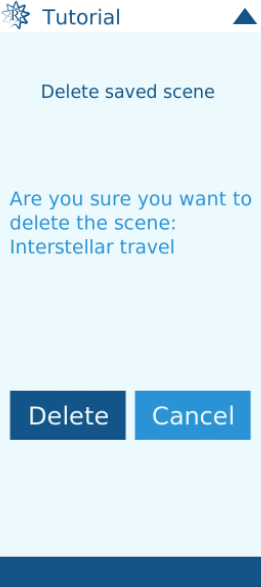
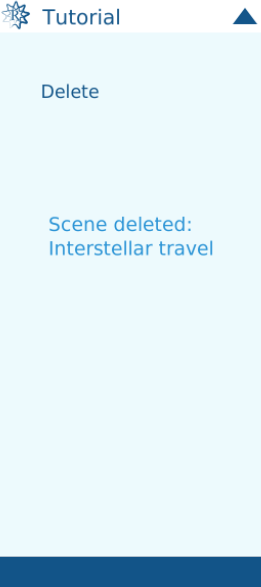
Click “Cancel” to return to the main menu, or “Delete” to go ahead with the deletion, which is confirmed like this:
Import and Export
It is possible to export a scene into a notecard in your inventory. You could then pass this notecard to other people to share your scene — the recipient can then import that scene into their own App. Or you could use it to import into other copies of your own App.
Exporting
Click the “Export” button, and you’ll see a list of scenes to pick from:

Simply click the one you want to export, and the App will pass you a notecard with the scene data, showing this blue dialog:
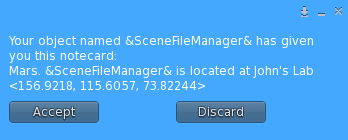
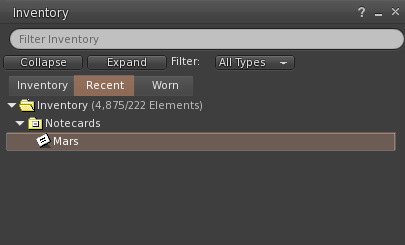
Click “Accept” and your notecard will be in your inventory, with the same name as the saved scene.
Importing
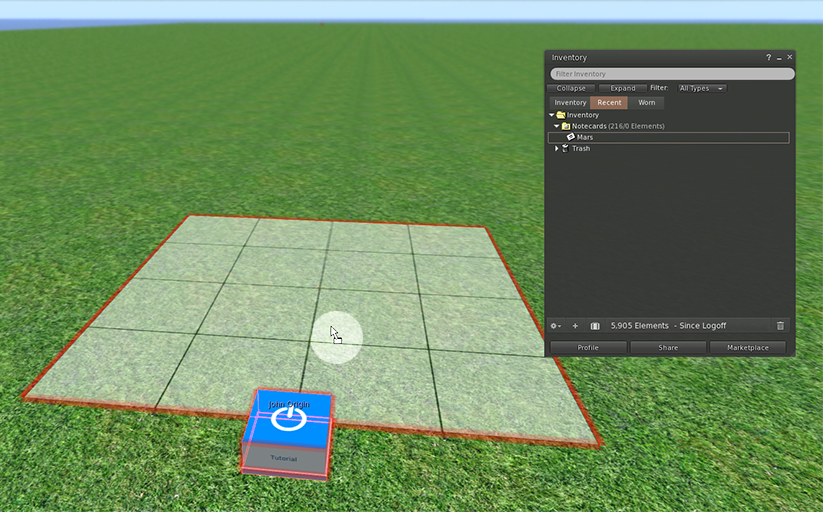
To import a notecard, click the “Import” button and you’ll see this on the HUD:

If you click “Cancel”, you’ll be taken back to the main menu.
Otherwise, locate the notecard in your inventory, and then hold down the Ctrl key while you click and drag it onto your App. Your mouse cursor will change into an arrow with a rectangle, and when it’s over the App, you’ll see a red outline like this (the mouse cursor is highlighted in this image):
Then release the mouse button while you see the red outline, and the scene in the notecard will be imported and added to your saved scenes.
You must be logged in to post a comment.